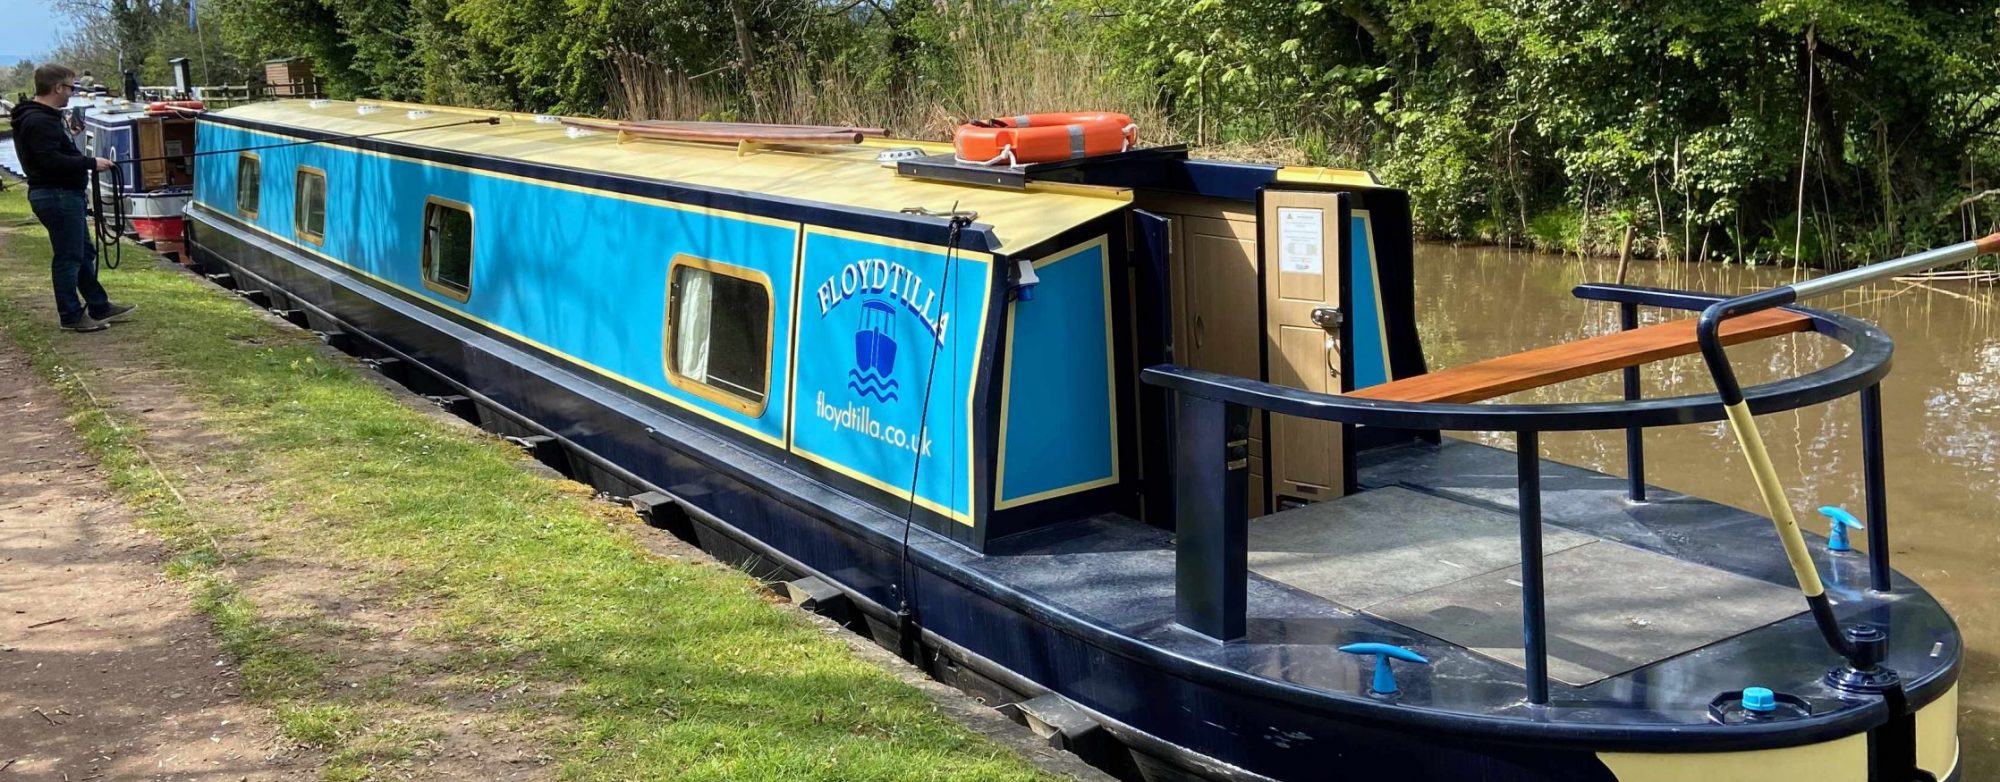

Isuzu 42 Diesel Engine – Service Time (Basic)

We log all our engine hours in a book with a running total, I know I have a gauge for this, but in a book I can note down anything else that happens and it reminds me when I need to do a service.

At or about 250 hours we change all the filters, I would rather be early that late with this as it is an old engine and while currently working fine, I want to keep it that way.

We got our last batch of filters from Online Filters I have found them to be quick and efficient, I always order double what I need for the service, filters are cheap so it seems best to keep some stock onboard.

For our IZUSU IM 4LC38 diesel engine I ordered the following filters


The oil we use is the recommend 15W/40 which came from Smith & Allan Lubricants (can be ordered from Amazon, but direct is just as quick and may well be cheaper). I ordered the 20 Litres pack as this should give me enough oil for engines  6.7 Litres and the gearbox 1.7 Litres for 2 complete changes.

Baldwin B161-S from Online Filters

A tool that may well be needed at this points is a ‘Draper Redline 100mm Oil Filter Strap Wrench‘ which, after operations on both thumbs over the years, has come in very handy for these modern cartridge filters.

The Engine Oil Filter

  1. First we need to warm the engine so that the oil is warm and flowing, a few minutes of gentle running on tick over should do this. If your engine is hot already, probably best to give it 30 mins to cool down first, it is easy to get burned when playing with a hot engine.
  2. Now is a good time to recommend and place an Oil and Fuel Absorbent Pad under the engine to collect any spills
  3. Now we can drain the oil. On our Isuzu 42 we have a pump for draining the engine sump (in a boat it is much harder, if impossible to get below the engine to collect the oil)
  4. Once the oil is drained we can remove the oil filter, that is when you may need the oil filter strap wrench.
    • Remove and carefully discard the filter, check the rubber seal has come off with the filter, then clean the mating surface on the engine is clean.
    • Using some clean oil, lightly lubricate the rubber seal on the oil filter.
    • Screw the filter in place hand tight, then with the oil filter strap wrench tighten it a further ¼ to ½ turn.
  5. Now replace the oil, being careful not to over fill the engine, do not just pour in the full 6.7 Litres, add some oil via the oil filler, then check the level with the dip stick, remember it takes a while for the oil to flow to the engines sump (so take your time) give it a few minutes for the oil to sink down.
    Note: An over filled engine with increase oil pressure and may prematurely age your engine.

The Fuel Filter

Our boat has a flow and return pipe from the high pressure diesel pump and near the tank are two taps that are normally in the ‘on’ position, before changing the fuel filter these need to be turned off.

The fuel filter on our boat is a cartridge type, and looks similar to the oil filter, again you may need the oil filter strap wrench to loosen it, diesel will leak out, so wear gloves (You can normally find some in a petrol station near the diesel pump, I usually pick up an extra pair when needed, they are very thin but do the job).

Our fuel filter could not been released with our normal oil filter strap wrench, but instead we use some adjustable oil filter pliers similar this these on amazon.

Also remember to put down an Oil and Fuel Absorbent Pad under the filter before trying to remove it, I put my old filters into a zip lock bag for disposal at out local domestic waste centre, they cannot be disposed of in domestic rubbish.

Replacing the filter is the same as the engine oil filter, clean the surfaces, lightly oil the rubber seal on the filter and tighten hand tight, and then a ¼ to ½ a turn more using the oil filter strap wrench.

Our boat is also fitted with a fuel Agglomerator (AKA a water separator), which is used to collect water in the glass (in our case) container below the pipe, the diesel floats on water so passes through the filter while the water drops into the bowl and can be removed by either removing the bowl or unscrewing a drain plug in the bottom.

Do remember to turn on the fuel taps, else things will not go well when starting the engine .

The Air Filter

The Air Filter is nice and easy to change, just three spring clips to remove the lid and a quick swap of the filter. I would normally only changes this every 2nd oil service, but I do check it each time.

Changing the Gearbox oil PRM 150

Our boat is fitted with a Newage PRM 150 gearbox, this uses the same oil as the engine 15W/40 and takes about 1.7 Litres.

  1. First we need to remove the dip stick/ oil filler plug with a 19 mm spanner .
  2. Under the gearbox is a sump plug that also uses a 19 mm spanner to remove, but before removal you will need to find a container big enough but also small enough to fit under the gearbox to collect the oil.
  3. Once drained, clean the sump plug and its washer, as well as the mating surface on the gearbox and refit hand tight and then pinch tight with a socket.
  4. Now fill with oil slowly vis the dipstick hole, checking the amount with the dipstick as needed.

NOTE: Having said all the above, my oil was last changed after just 250 hours usage and the oil looked like new, so we decided not to change it this time.

Other basic checks

At this point, we also check for any loose bolts and wear and tear in the prop shaft and its couplings, then check the engine mounts bolts and any other ancillaries that are bolted on. Also check any cables and pipes for chaffing where they pass through bulkheads and finally look at the exhaust pipe for leaks (generally obvious due to black soot marks).

We did find that one of the alternators was loose and the long 130mm bolt was very warn, so this is also being replaced.

Basic service is now complete for another 250 hours

Thanks to:-

My thanks goes to Steve Cowham of STC Marine Engineering, without whom I would not have been able to watch him do all the hard work while I recover from an operation on my left hand.

Useful documents for Isuzu Users
HMI Isuzu Manual
HMI Isuzu Manual


Isuzu Diesel Engine 4LB1, 4LC1, 4LE1 Instruction Manual

INDUSTRIAL
DIESEL ENGINE
4LB1, 4LC1, 4LE1
MODELS
WORKSHOP MANUAL

Isuzu Diesel Engine 4LB1, 4LC1, 4LE1 Workshop Manual

Floydtilla BSS Certificate – Passed

Floydtilla’s BSS certificate is due to expire at the end of April 2025, so it was time to book a test, we have added a few new bits and pieces to the boat in the past 4 years including our new solar panels – it is always a worry when you do the planning/install yourself.

As with the last test and survey we booked Tom Keeling from Small Craft Services to do this for us. Two days before the appointed day, I check with Tom that everything was going as planned, and we headed of the next day to the boat, to be ready for his visit.

Tom arrived very promptly at 9am, he first explanied the procedure and then we started at the stern looking in the engine bay, where he carefully explained what he was looking for, checking the fuel tank for rust and damage, the fuel lines, filters etc, before then checking the batteries and our new battery wiring and solar install (he noted the fuses etc) everything seemed OK, except the batteries could slide sideways in there mounting, We already had a ratchet strap over the top of the batteries, but within a few minutes we also had one install around the sides as well.

From the Engine bay we moved inside and checked the Fire Extinguishers, we have three mounted in the boat, and I have three extras for just encase (could not resist the Lidl special offers, they are two lower rating, but better to be safer?).

From what I remember of the discussion each extinguisher has a rating i.e. 8A/50B that you will find on the body label of the extinguisher, you need to add up the number of ‘A’ and the number of ‘B’, combined between you extinguishers they need to exceed 21A and 144B together, this is dependent on the length of the boat, at 61ft we need a minimum of 3 extinguishers in total.

Next we are on to the gas supply and the Gas locker was expected and the pipes inspected for the correct type, we only have a gas cooker connected to the supply and near the kitchen area is a test point to which Tom fitted his Manometer. after a few minutes all seemed to check out OK. Then Tom slid out the cooker to show me and to check the pipework was correct.

It is amazing how quickly and hour and a half went by, Tom is a mine of useful information and advice and I am sure I missed out lots of things he inspected along the way, but I now feel very confident we are safe onboard and also not a danger to others.

BSS Examination Report

The cost of this inspection including VAT was £260 (which includes a £72 charge by the Boat Safety Scheme for the certificate.

New Macerator Pump Fitted

A couple of weeks ago we visit the Marina fit more new curtains and measure the roof to find the best options for solar panels. Unfortunately we found the toilet was not working as expected, it would flush, but after flushing there would be more water in the bowl that expected, and after a second flush it would increase again.

We tried cleaning the toilet and using a plunger to push the water into the tank, but we could not resolve the problem and so had decided put it off to another visit, when I would have more time and tools.

On the way home I decided to texted Steve Cowham, who had come to our rescue fitting the water pump in the summer, I have poorly thumbs and am trying to save myself from further operations, luckily Steve was able to take a look and soon called me back.

Tecma 12V Silence / Elegance Macerator PumpHis suggestion was that the Macerator Pump had probably worn out, having been an X-Black Prince hire boat for 12 years, it would have been well used. He was happy to fit one for us and recommend we order one from Midland Chandlers the part we needed was a “Tecma 12V Silence / Elegance Macerator Pump” part number TG-224.

This was ordered and shipped directly to Steve via the marina, at £249.50 they are not cheap, but they need to work.

A few days later it is all fitted and working, we will be back to the boat soon and I am sure we will be testing it.

Steve, don’t forget to send us the bill, thanks 🙂

The Hull Blacking Experiance

We decided we should get the hull blacked, as we did not wish to leave it too long and end up with more problems. I had checked around on the boat forums and Facebook groups so I had an idea of the costs involved.

We had initially planned to get the boat hauled out and do the work ourselves, all part of the boating experience, so we went to the Marina office to ask the costs etc, by the time we left we had decided to let them do everything.

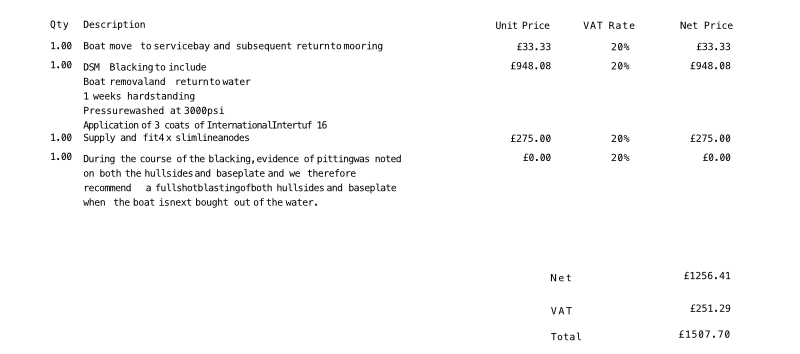
We even went for 3 coats for extra protection. The cost including everything was estimated to be about £1200.00 Inc VAT.

After our chat I was very sure they would do a better job than me, far quicker, and with much less pain and effort on my part. The plan was they would move the boat to the slipway, load her onto a trailer and pull he out to be placed on blocks.

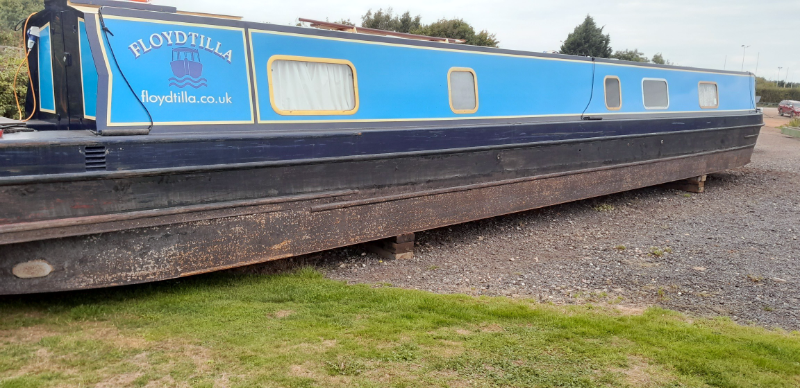
Stripped, ready for painting

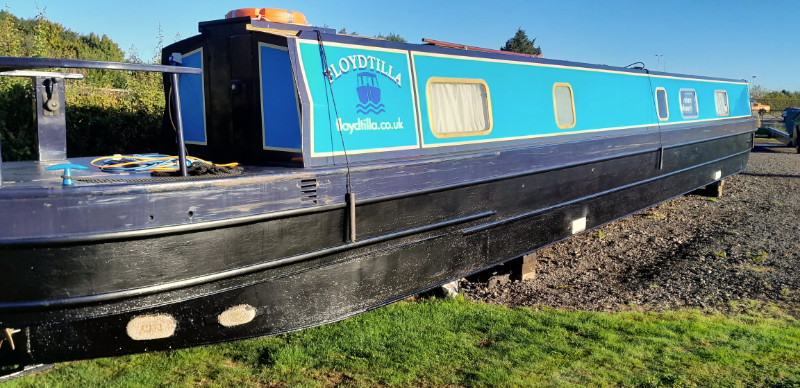
After they cleaned up the hull ready for blacking, they noticed some pitting about midway along the hull, nothing major, but would recommend checking carefully next time. A recommendation was to fit some slim extra anodes fore and aft of this area, as you can see below. Fitting these cost an about £275 on the final invoice.

Blacked with extra anodes fitted

All looking good, she is ready to go back in the water

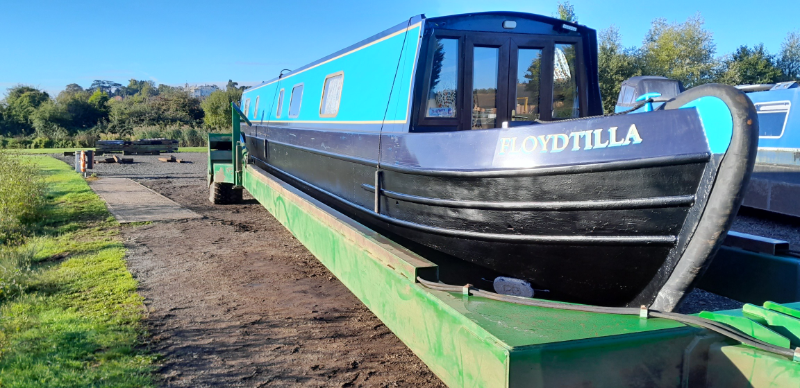
Back on the trailer

Slipped back onto the trailer and heading to the slipway

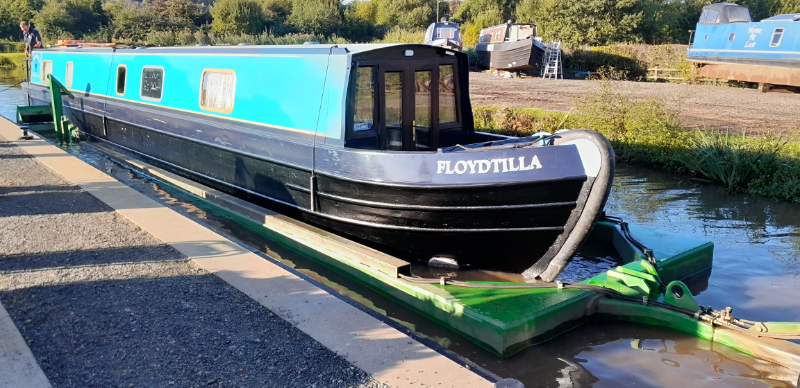
Back in the water

Now back in the water, it is an impressive trailer

All done with a tractor

As you can see, all done with the trusty aide of a tractor.

The final bill was £1507.70 including the new anodes.

Droitwich Spa Marina did an excellent job as far as we could judge, passing on the notes about pitting gives us more options for when we do this again. I must thank them for all the pictures and care they took with our boat.

Batteries and Battery Monitors Part 4 – Battery Monitor & The Shunt

Our Battery Monitor

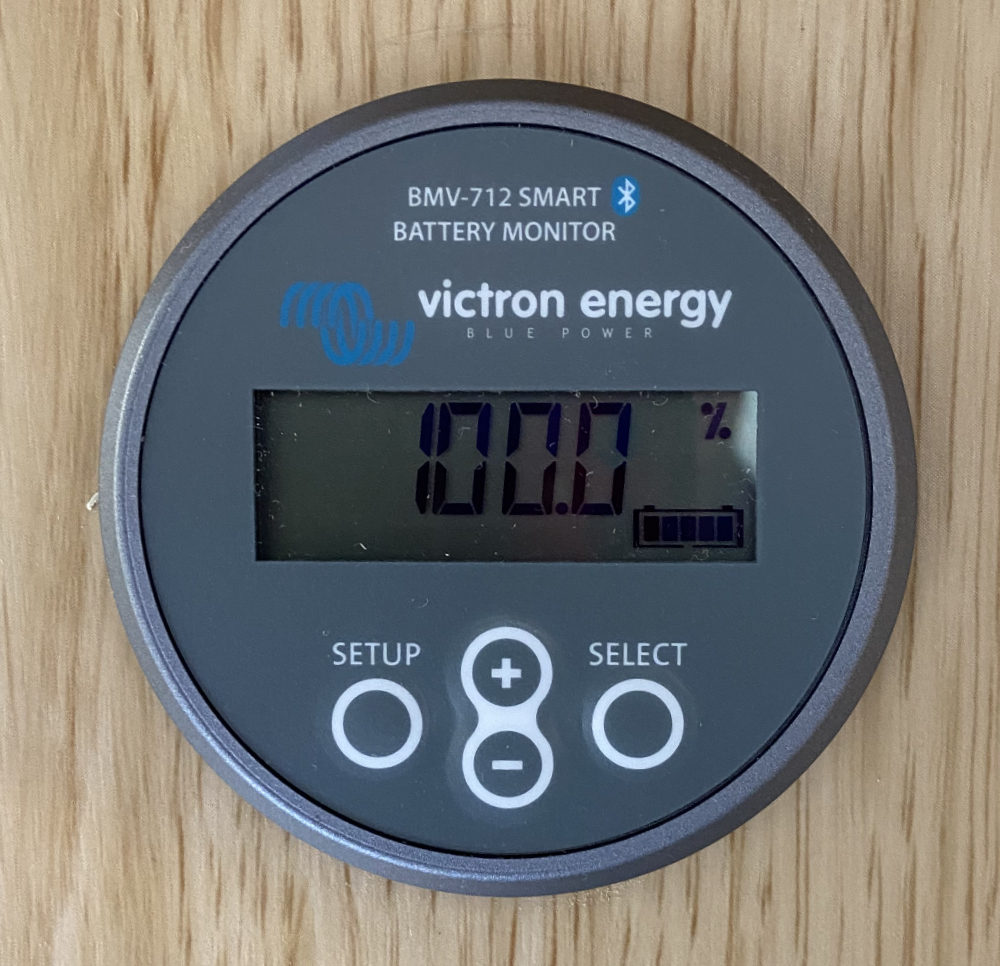
I have installed a Victron Energy BMV-712 Smart battery monitor, but there are many other options from other manufacturers, see the listing at the end of this article.

I selected this one as it gave me the opportunity to connect to my onboard Raspberry Pi which I am using to give some smart boat features and provide live location tracking for my website in the future.

Our Battery Monitor Display

The battery monitor comes in two parts, a display which provides a readout of the battery status and a means of programming/setting up the system for your configuration.

The Shunt

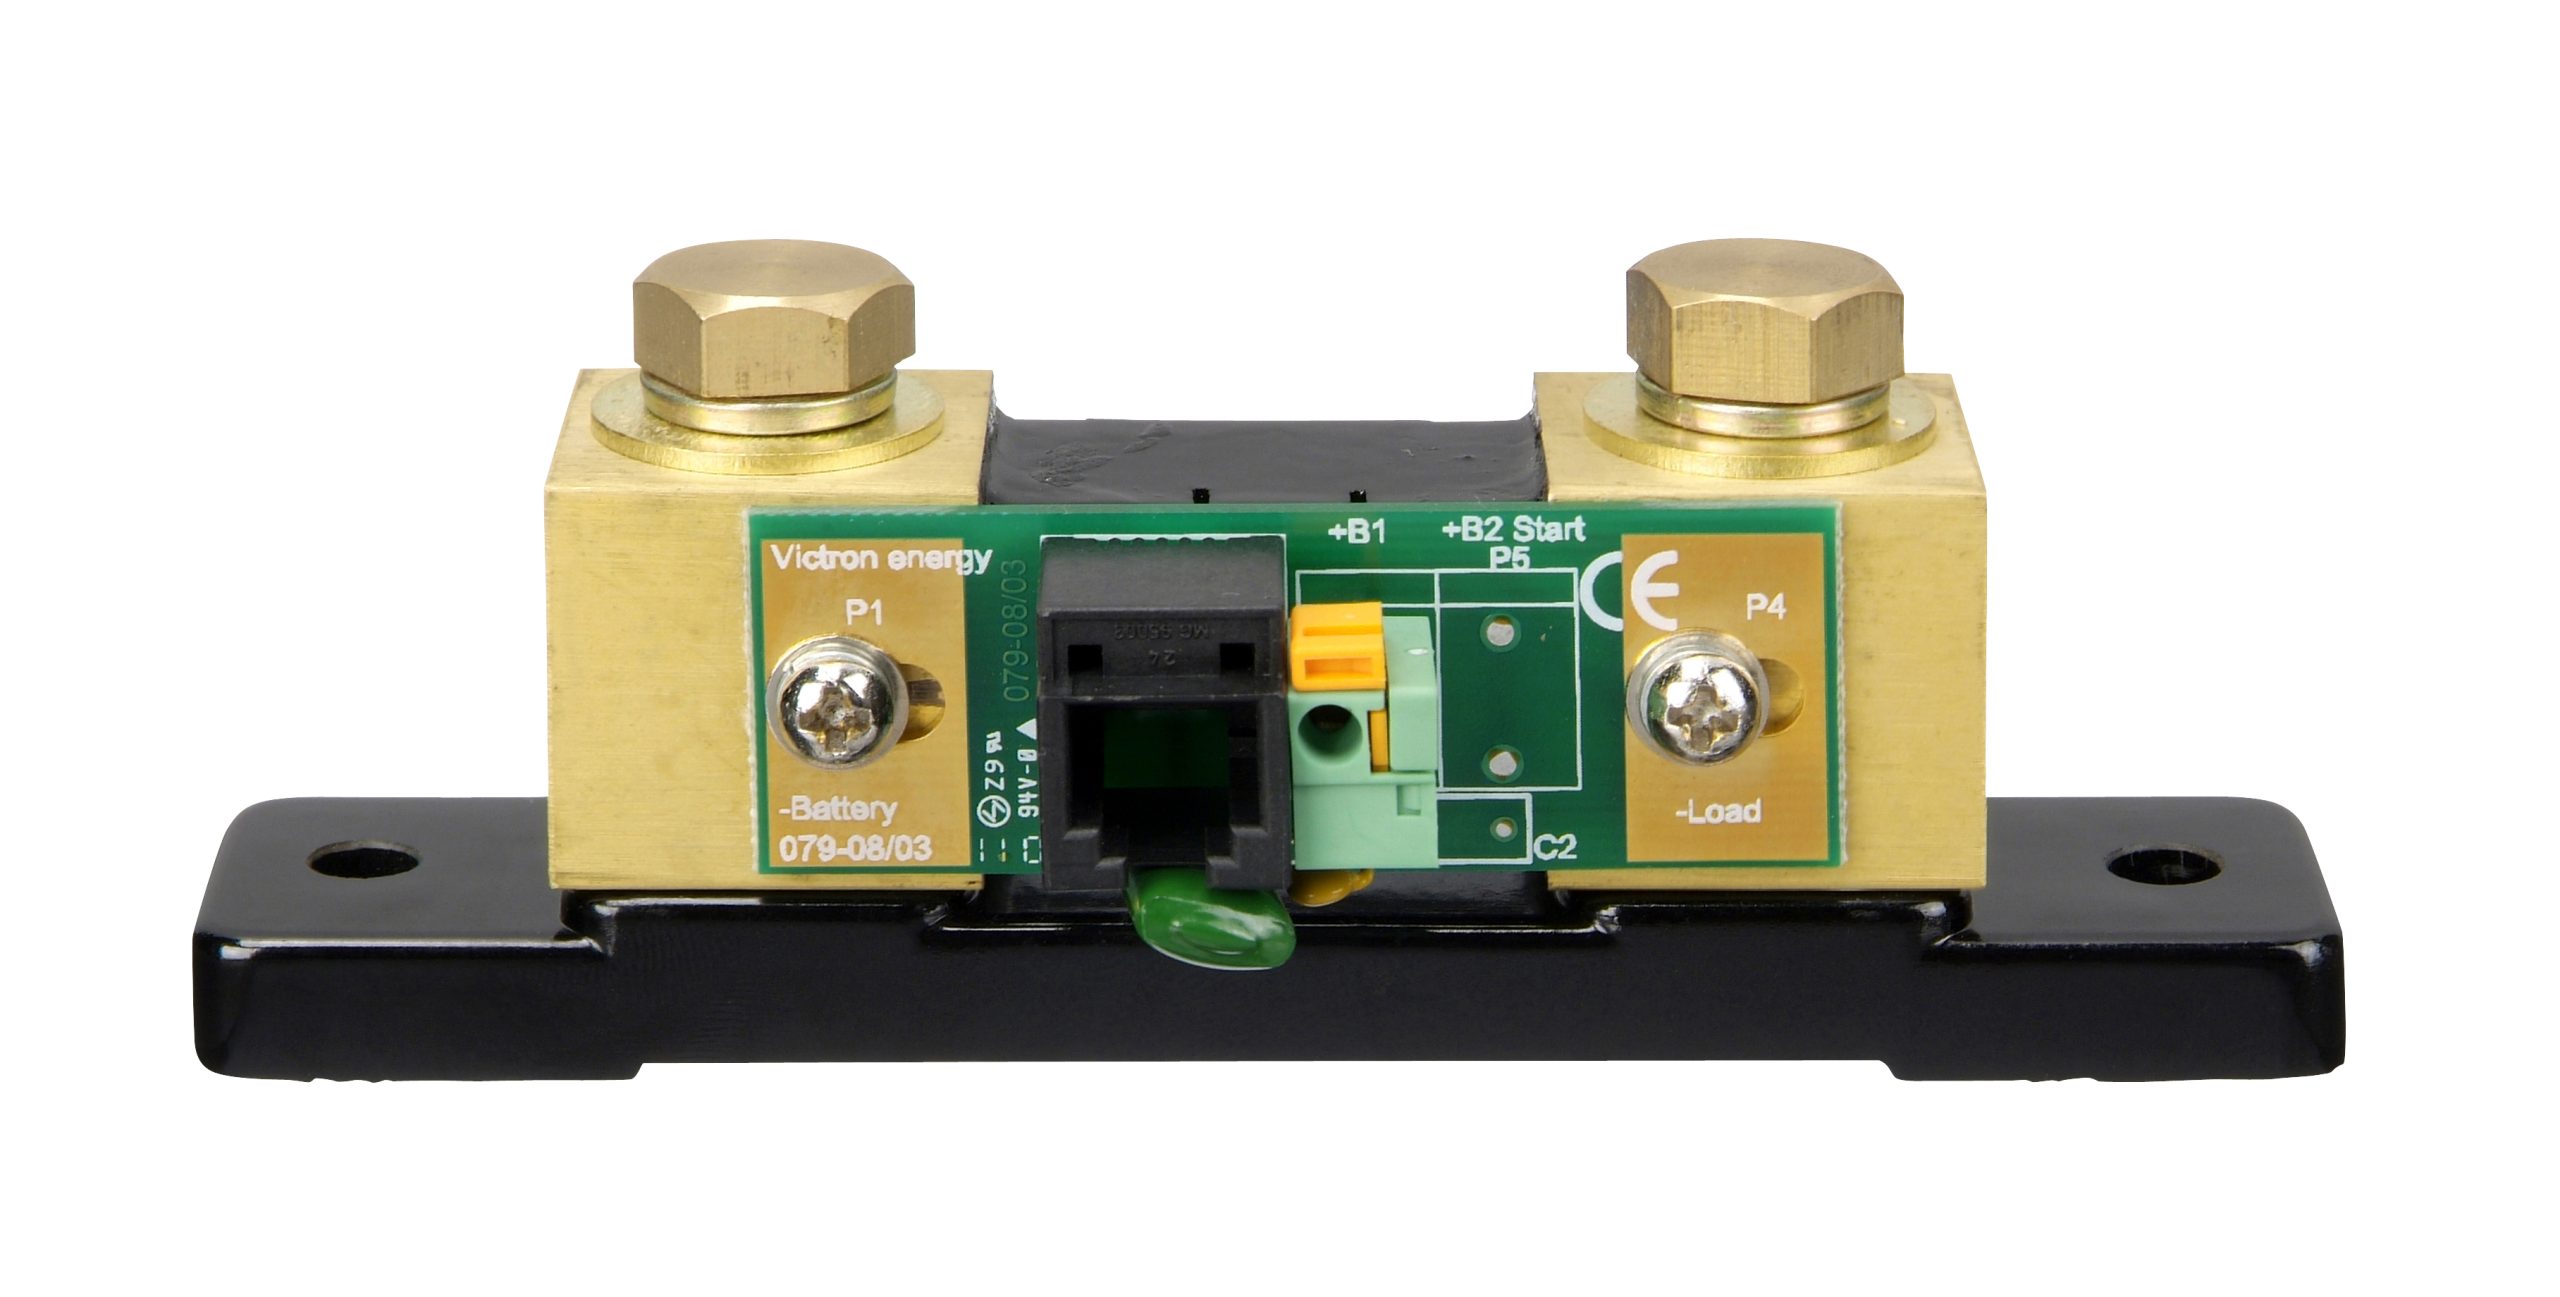
Victron Shunt
Victron Shunt (c)Victron

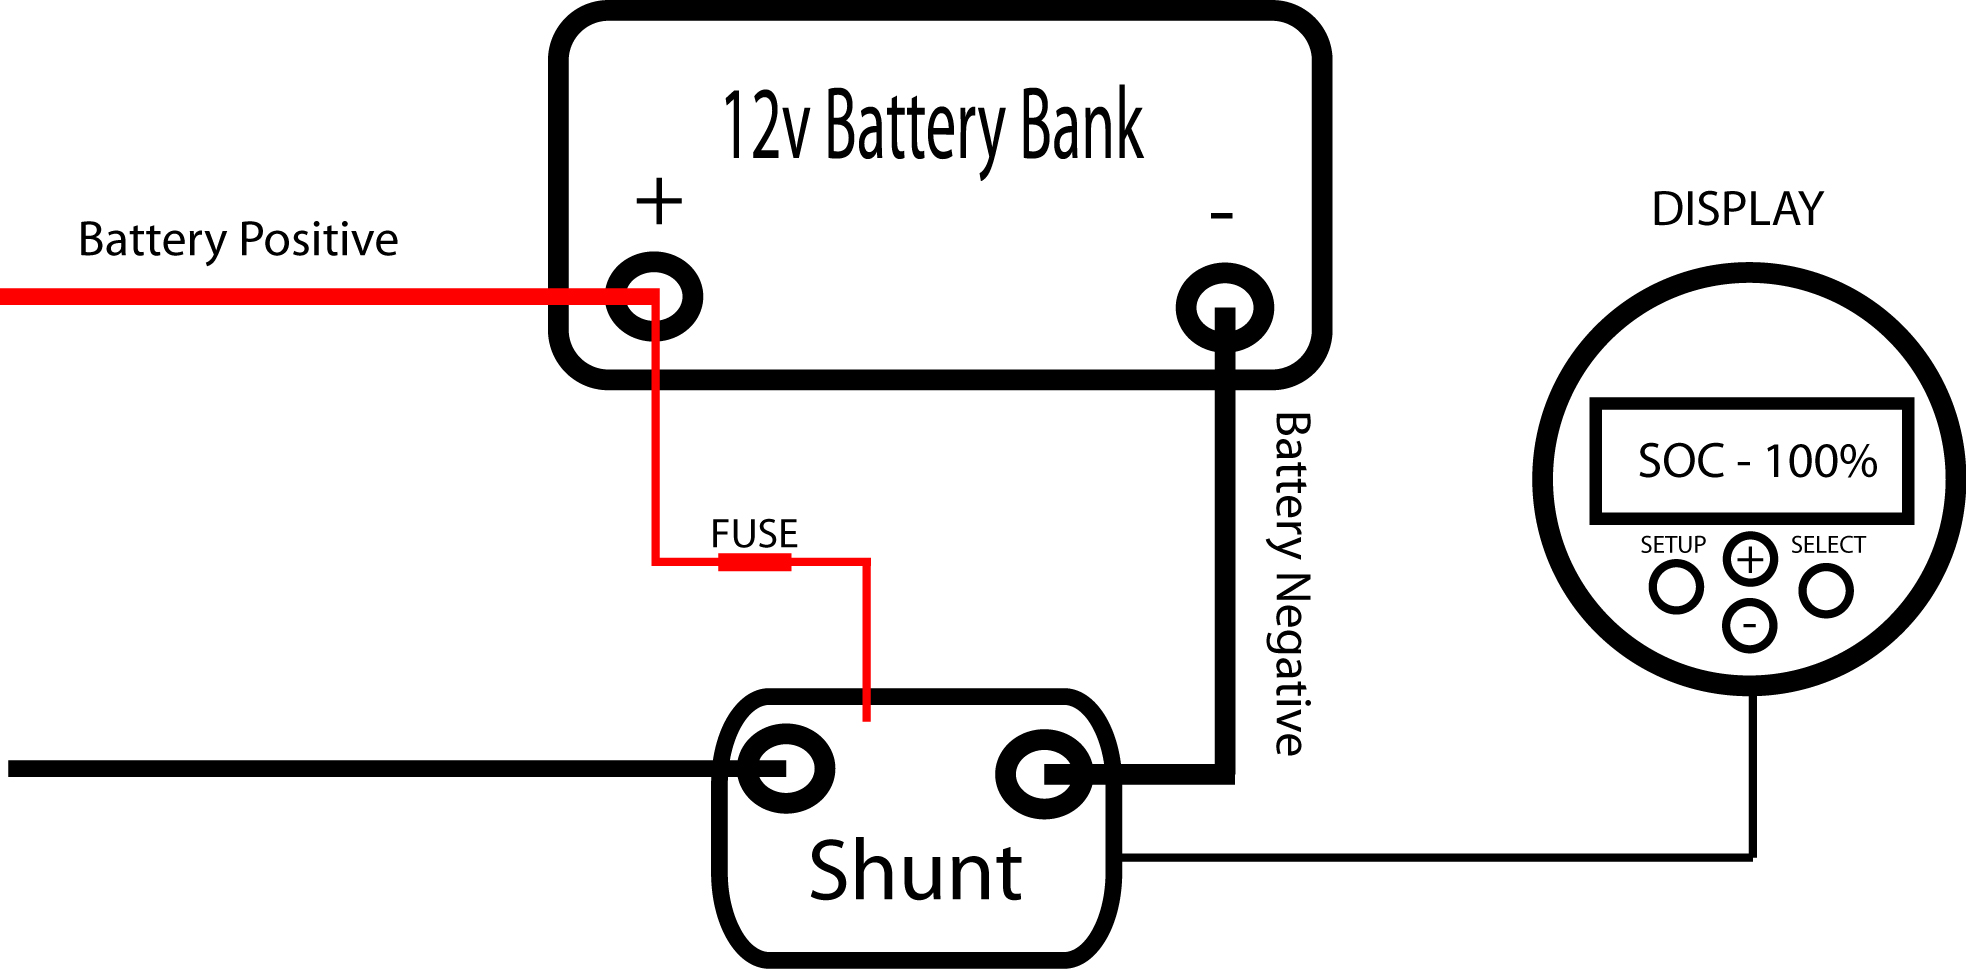
The second part is called a shunt, this needs to be placed, in our case, on the negative side of the battery bank, so that everything must pass through it to reach the battery, there should be no other connections to the negative side of the batteries else your measurements will never be accurate.

A shunt is a resistor of very low but known value that is placed in parallel with a voltmeter so that all the current being measured flows through it. The voltage drop across the shunt’s resistor is measured; this voltage drop across the shunt is proportional to the current flowing and can then be calculated using Ohms law (Current = Volts / Resistance).

Shunts are rated for the maximum current they can measure, in our case 500A which at 12V is 6000W, more than enough for our boat.

Basic Battery Monitor Wiring

The battery monitor also has an extra cable that connects to the positive side of the battery bank to power the electronics and the display, but also to measure the current battery voltage, we have an extra wire connected to the starter battery, so we can monitor its voltage as well.

Peukert’s Law

To then calculate the remaining capacity of the battery, the monitor uses an adaptation of Peukert’s Law** which can be used to calculate the capacity of lead acid batteries at different rates of discharge.  As we discussed earlier, the discharge rates affect the battery capacity.

** Developed by Wilhelm Peukert (1855-1932) Peukert’s law is used to calculate the batteries deliverable capacity at the current given rate of discharge, His law describes the batteries capacity at a constant discharge until it reaches its cut off voltage, below which you can damage your battery, this constant is called ‘K’, for example K=1.25 is used for our flooded lead acid batteries. There are however some limitations to this law as it does not consider the batteries temperature or age. I expect each monitor manufacturer modifies this to consider these extra factors when displaying the results, our system records each battery charge/discharge cycle.

The capacity of a battery falls at higher rates of discharge because the chemical reaction within the battery reaches its maximum speed for the given plate size and therefore the voltage drops. If left to recover, that missing capacity will return.

Using these calculations, a battery monitor can calculate the available power remaining while the battery is in use (under load) and as that load changes or even as the battery is charging, it can display the current State of Charge (SOC).

Now you know what is happening?

Armed with this information, you can then decide how you want to operate your boat and if you will need to start the engine to charge the batteries. One of our future projects is to work out the size we need for some solar panels, and we will use the data from the battery monitor to help calculate the size system we need, but that is a topic for another day

Battery Monitors Suppliers

Victron – www.victron.com
NASA Marine Instruments – www.nasamarine.com
Advanced Yacht Systems – www.advanceyacht.co.uk
Simarine – simarine.net/
Votronic – www.votronic.de

Safety Disclaimer