Batteries and Battery Monitors Part 1 – Why we needed one

In this multi part post we are going to look at why you need a battery monitor in the first place, the alternative types of batteries available and then how they are rated for capacity.  It is then useful to know how your battery charger works before rounding up by looking at what a battery monitor can calculate for you.
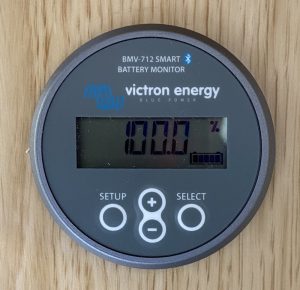
Our Battery Monitor
Our Battery Monitor

Having been electric car users for a number of years we understand how careful use of our batteries can extend our range. It still came as a surprise to us when we hired a boat and the lights would go out quite early if we stayed for a couple of days without running the engine. Hire boats are designed to be used, they have just enough battery capacity to do the job, they normally don’t include solar panels, or even a larger inverter.

Part of our upgrades and modification of our ex-hire boat, floydtilla.co.uk, was to add an additional leisure battery and upgrade the inverter to an 3500W inverter charger with a shoreline charger.

The batteries are one of the most expensive consumables on your canal boat, good management of them can increase their life by many years, and the best way of keeping them in good condition is to know how much power you have available.

Why voltage is not enough

When I started looking at battery monitors, it was suggested “Why bother all you need is a voltmeter to see your state of charge” and while mostly true, you can tell a lot from the battery voltage. The voltage will drop if you are using the battery, and most of us cannot be bothered to isolate the batteries before taking a reading.

A good battery monitor not only displays the current battery voltage, but it also displays the current in amps and the power in watts being used. This can be extremely useful when trying to find out how much power you are using and on what device. On the monitor we installed we also get a time remaining display which shows us in hour and minutes how long the battery will last at the current usage.

When battery size is not the FULL answer?

The biggest confusion with battery monitors and what causes the most misunderstanding is the State of Charge/Voltage displays. In use, a battery’s voltage will drop depending on the load it’s providing, and batteries do not really have a fixed capacity; it all depends on how you use them. Even when new, it is unlikely your 400Ah battery bank will give you a true 400Ah, and then will only degrade as they get older.

Your battery’s capacity will vary widely depending on how fast you discharge it. The slower you discharge the battery the higher its potential capacity and the faster you discharge it the lower its capacity.

We tend to leave the battery monitor on its “Time Remaining” display as this very quickly shows me if what I am doing will cause me a problem, and if I will need to run the engine before we move on.

Inverters eat your power

Inverters use quite a lot of energy converting your batteries 12V or 24V up to the 240v, most seem to be between 80-90% efficient, so that would mean that for 200w you are really consuming up to 240W. Inverters become more efficient when they reach over approximately 30% of their capacity, so best not to use them to just power your mains phone charger.

Monitoring what’s using your battery

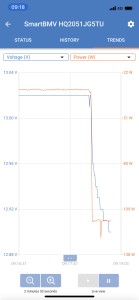
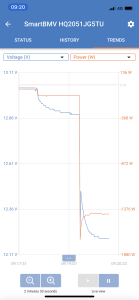
The battery monitor we fitted has a Bluetooth connection to a smartphone (currently both Apple and Android apps are available). Using this, I captured some screenshots showing the battery usage (Click on the image to enlarge).
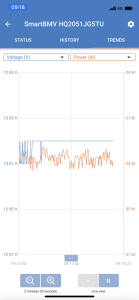
Fridge and Laptop usage Inverter Switched On Vacuum Cleaner
Just the Fridge and Laptop Inverter switched on Vacuuming

When using our mains vacuum cleaner via our inverter from the battery bank, the monitor dropped to just under 2 hours left at that usage, but this soon returned to days after I had stopped cleaning. Even I would find it hard to hoover for 2 hours on our narrow boat.

Different battery technologies have different profiles when it comes to their capacities. Lead Acid batteries should only be discharged to 50%, else permanent damage can occur, so even when you have a battery that states 100Ah capacity, you may only have a usable 50Ah capacity, and this will drop as the battery ages.

Your Battery C-Rating

Batteries are often marked with a C rating which gives the number of hours that the battery is designed to deliver its fully capacity over. Our Leoch Adventurer SFL-110 batteries have two C rating marked for their capacity 100Ah C100 and 85Ah C20.
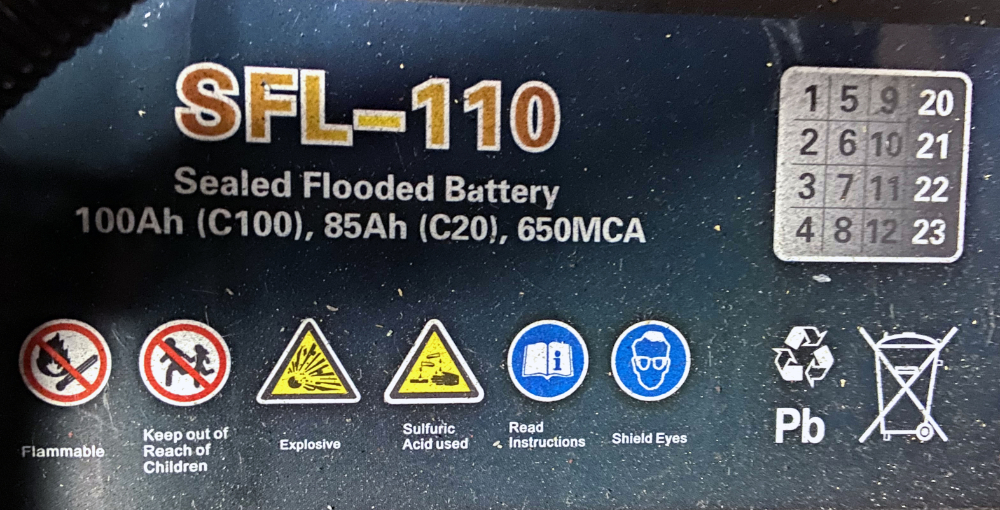
Battery C Rating
Battery C Rating

This means that the battery will provide 100Ah if discharged over 100 hours or just 85Ah if discharged over 20 hours.

e.g.

C20 85Ah The battery can discharge at a rate of 4.25 amp for 20 hours 4.25 X 20 = 85Ah
C100 100Ah The battery can discharge at a rate of 1 amp for 100 hours 1 X 100 = 100Ah

So far, we have been talking about Lead Acid Batteries, which are still the most common batteries found onboard and the most limited in terms of usable capacity.  In the next part of this series, we will look at the available battery options and their costs.
Safety Disclaimer

New Heating Thermostat and Isolation Switches

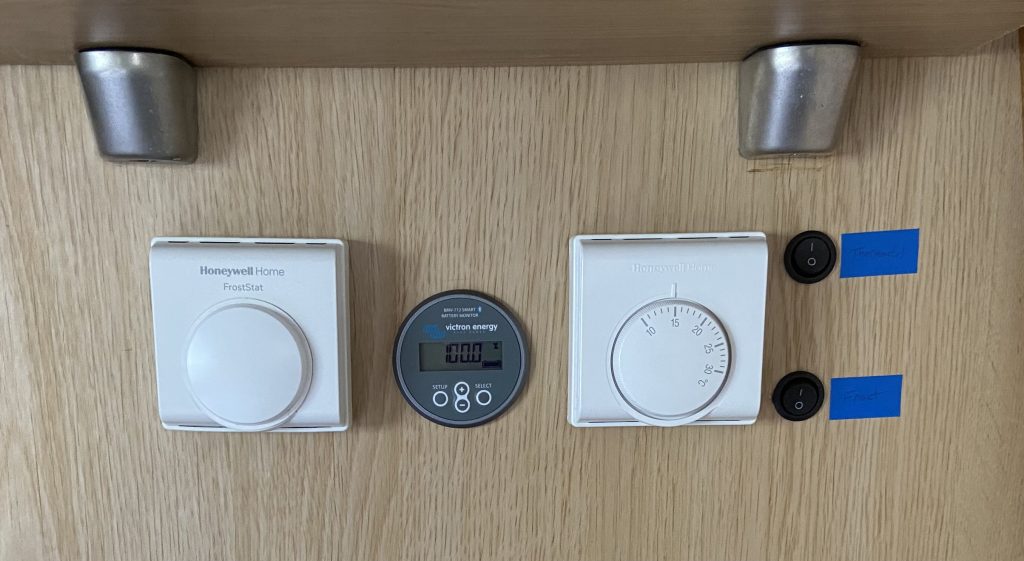
Another quick trip to the boat last weekend to fit another thermostat this time so we can control the heat. Last time I fitted a frost thermostat that I wired in parallel with the heater on/off switch.

This time I added a normal household thermostat again in parallel, but I also added switches so we can switch off either of them and just use the original heater on/off switch.

Frost and Heating Thermostats

For the moment I put small bit of insulation tape so I could label the switches.

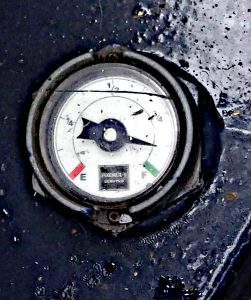
Diesel Gauge
Diesel Gauge

Now with the heating thermostat we can leave the heating on low when we go out and return to a not so freezing boat.

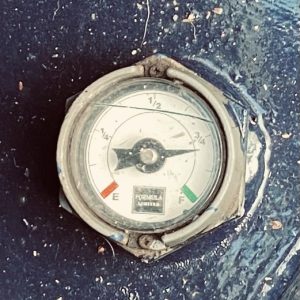
Now we have been on the boat for two long weekends and left the frost thermostat on while we have been away and we have used almost ¼  of a tank of diesel, the tank hold 350 Litres or 77 Gallons, so we have used 80 Litres, plus a little mains electricity to keep it all running.


Eberspächer D4W Diesel Powered Frost Protection – Update

Winter is not over for us yet, there will be a lot more opportunities for our canal boat Floydtilla to freeze.  In November I fitted a frost thermostat to control the Eberspächer D4W Hydronic diesel heater, before that it was just a pull button start and it would run until the water returning to the diesel heater was to hot, now with the frost thermostat we have it switching on if the internal temperature of the boat reaches between 2 and 4 degrees.

Diesel Tank Usage
Diesel Tank Usage

We have mains power at the marina, and also a large diesel tank, but I was still worried that our tank would run out or a prepaid electricity would run out, either could have stopped the heating working.

So last weekend we went to visit the boat and check everything was working, and to our great good fortune, it all had been working very well. We can see the diesel tank gauge had dropped, but not by much, less that a eighth of a tank used in two months, and our prepaid electric which was at about £25 when we last left was down to about £10. The electric in the marina is not cheap, but this summer may be the time I fit some solar panels for complete independence.

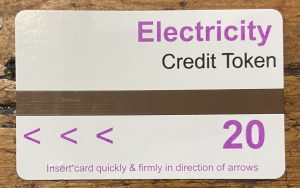
Electricity Topup Card
Electricity Top-up Card

Went we left on Sunday, we topped up the electricity with another £20 just encase, we do hope to be back within a month, but you never know.

The next project for Feb is to fit a thermostat so we can set and maintain a temperature, and also add some isolation switch for both thermostats so we can override them if needed after that we want a remote control for the heating so I can turn it on before we arrive on a cold day.

Winterizing final things

Having setup the frost thermostat during the day, the last things I did when leaving the boat was to switch off the water pump and leave all the taps open, just encase this freeze, the main boat water tank is not full after our last trip.

Final check and the diesel tank is full and we have nearly £30 on the electricity meter.

Frost Protection options with our Canal Boat

This is going to be our first winter with a canal boat, and I have been looking at how we can protect the boat against freezing.

I had a few options:-

  • I could drain all the water out of the boat, i.e. the water tank and the heating system. But we intend to visit the boat over the winter as a jumping off spot for visiting relations.
  • We do have mains power, so I could place some oil filled radiators in the boat, they would need an anti frost setting. This looks like a viable and popular option, but we have to prepay for electricity and I have no idea how much we would need.
  • The boat is fitted with a very effective diesel powered heating system, with radiators around the boat. At present, the control system is very primitive, with just an on/off switch, we have used it a few times. I would need to fit a frost thermostat to make it effective.

After much studying and asking questions on Facebook and the online forums, I decided to go with the third option and use the built-in diesel heater. We have a large diesel tank, so this I hope will last the winter.

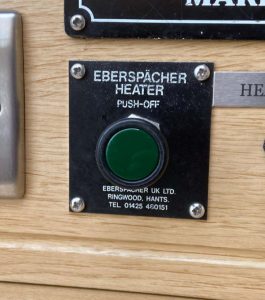
Eberspacher Heater Switch

Our boat is fitted with an Eberspächer D4W Hydronic water heater which heats the radiators and provides hot water when required, which in the summer is not often. It is controlled by a simple pull switch.

I then tried to source a 12v frost thermostat, from what I could see a 12v Honeywell frost thermostat part no 4111263a would do the trick. The prices of these seem to vary from each supplier, but in the end I selected PB Auto Electrics as the price and delivery seemed reasonable.

But when it arrived, it was the T4360 240v frost thermostat, A quick check with PB Auto Electrics and, they confirmed it was exactly the same device, I wish I had known before it would have made finding one a lot simpler.

NOTE: This type of thermostat is a very simple device, that uses a bimetallic strip as a switch when temperature changes see here for a more detailed explanation.

My plan was to fit the thermostat is parallel with the current switch, so I could still use the switch when needed, the frost thermostat could then operate independently when the internal temperature of the boat gets too low.

To install the thermostat, I made some extension leads from the switch to the new thermostat and mounted it on an internal wall near the control panel.

The switch had two wires attached, a yellow wire and a red wire. The red wire has 12V supply from the heater, and the yellow goes back to the heater to trigger it to start.

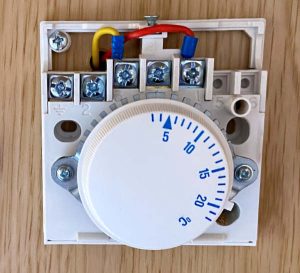
Inside Thermostat
Inside Thermostat

Inside the thermostat, I extended the red wire to terminal 1 and the yellow to terminal 3.

When you remove the cover of  the frost thermostat it revels a wheel with the temperatures marked on it, it is pretty much a normal  thermostat with a cover that stops adjustment.  To test the setup changed the setting to  above and below the current temperature.

Everything worked as expected, so I finally set it to between 3 and 4 degrees.

Before I left, I did take a photo of our fuel gauge, so I can see roughly how much diesel we use.

Next I will add  a frost protection switch, so I can isolate this in case of problems, I could have done this with the current switch, but I expect to add a normal thermostat later which will work with the switch or replace it.