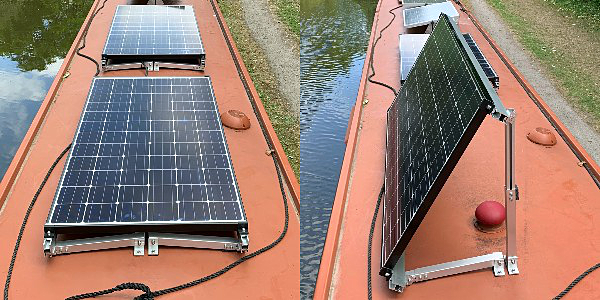
Our system cost well under £800 including some high quality tilting solar mounts and extra large solar panels (425 Watts each).
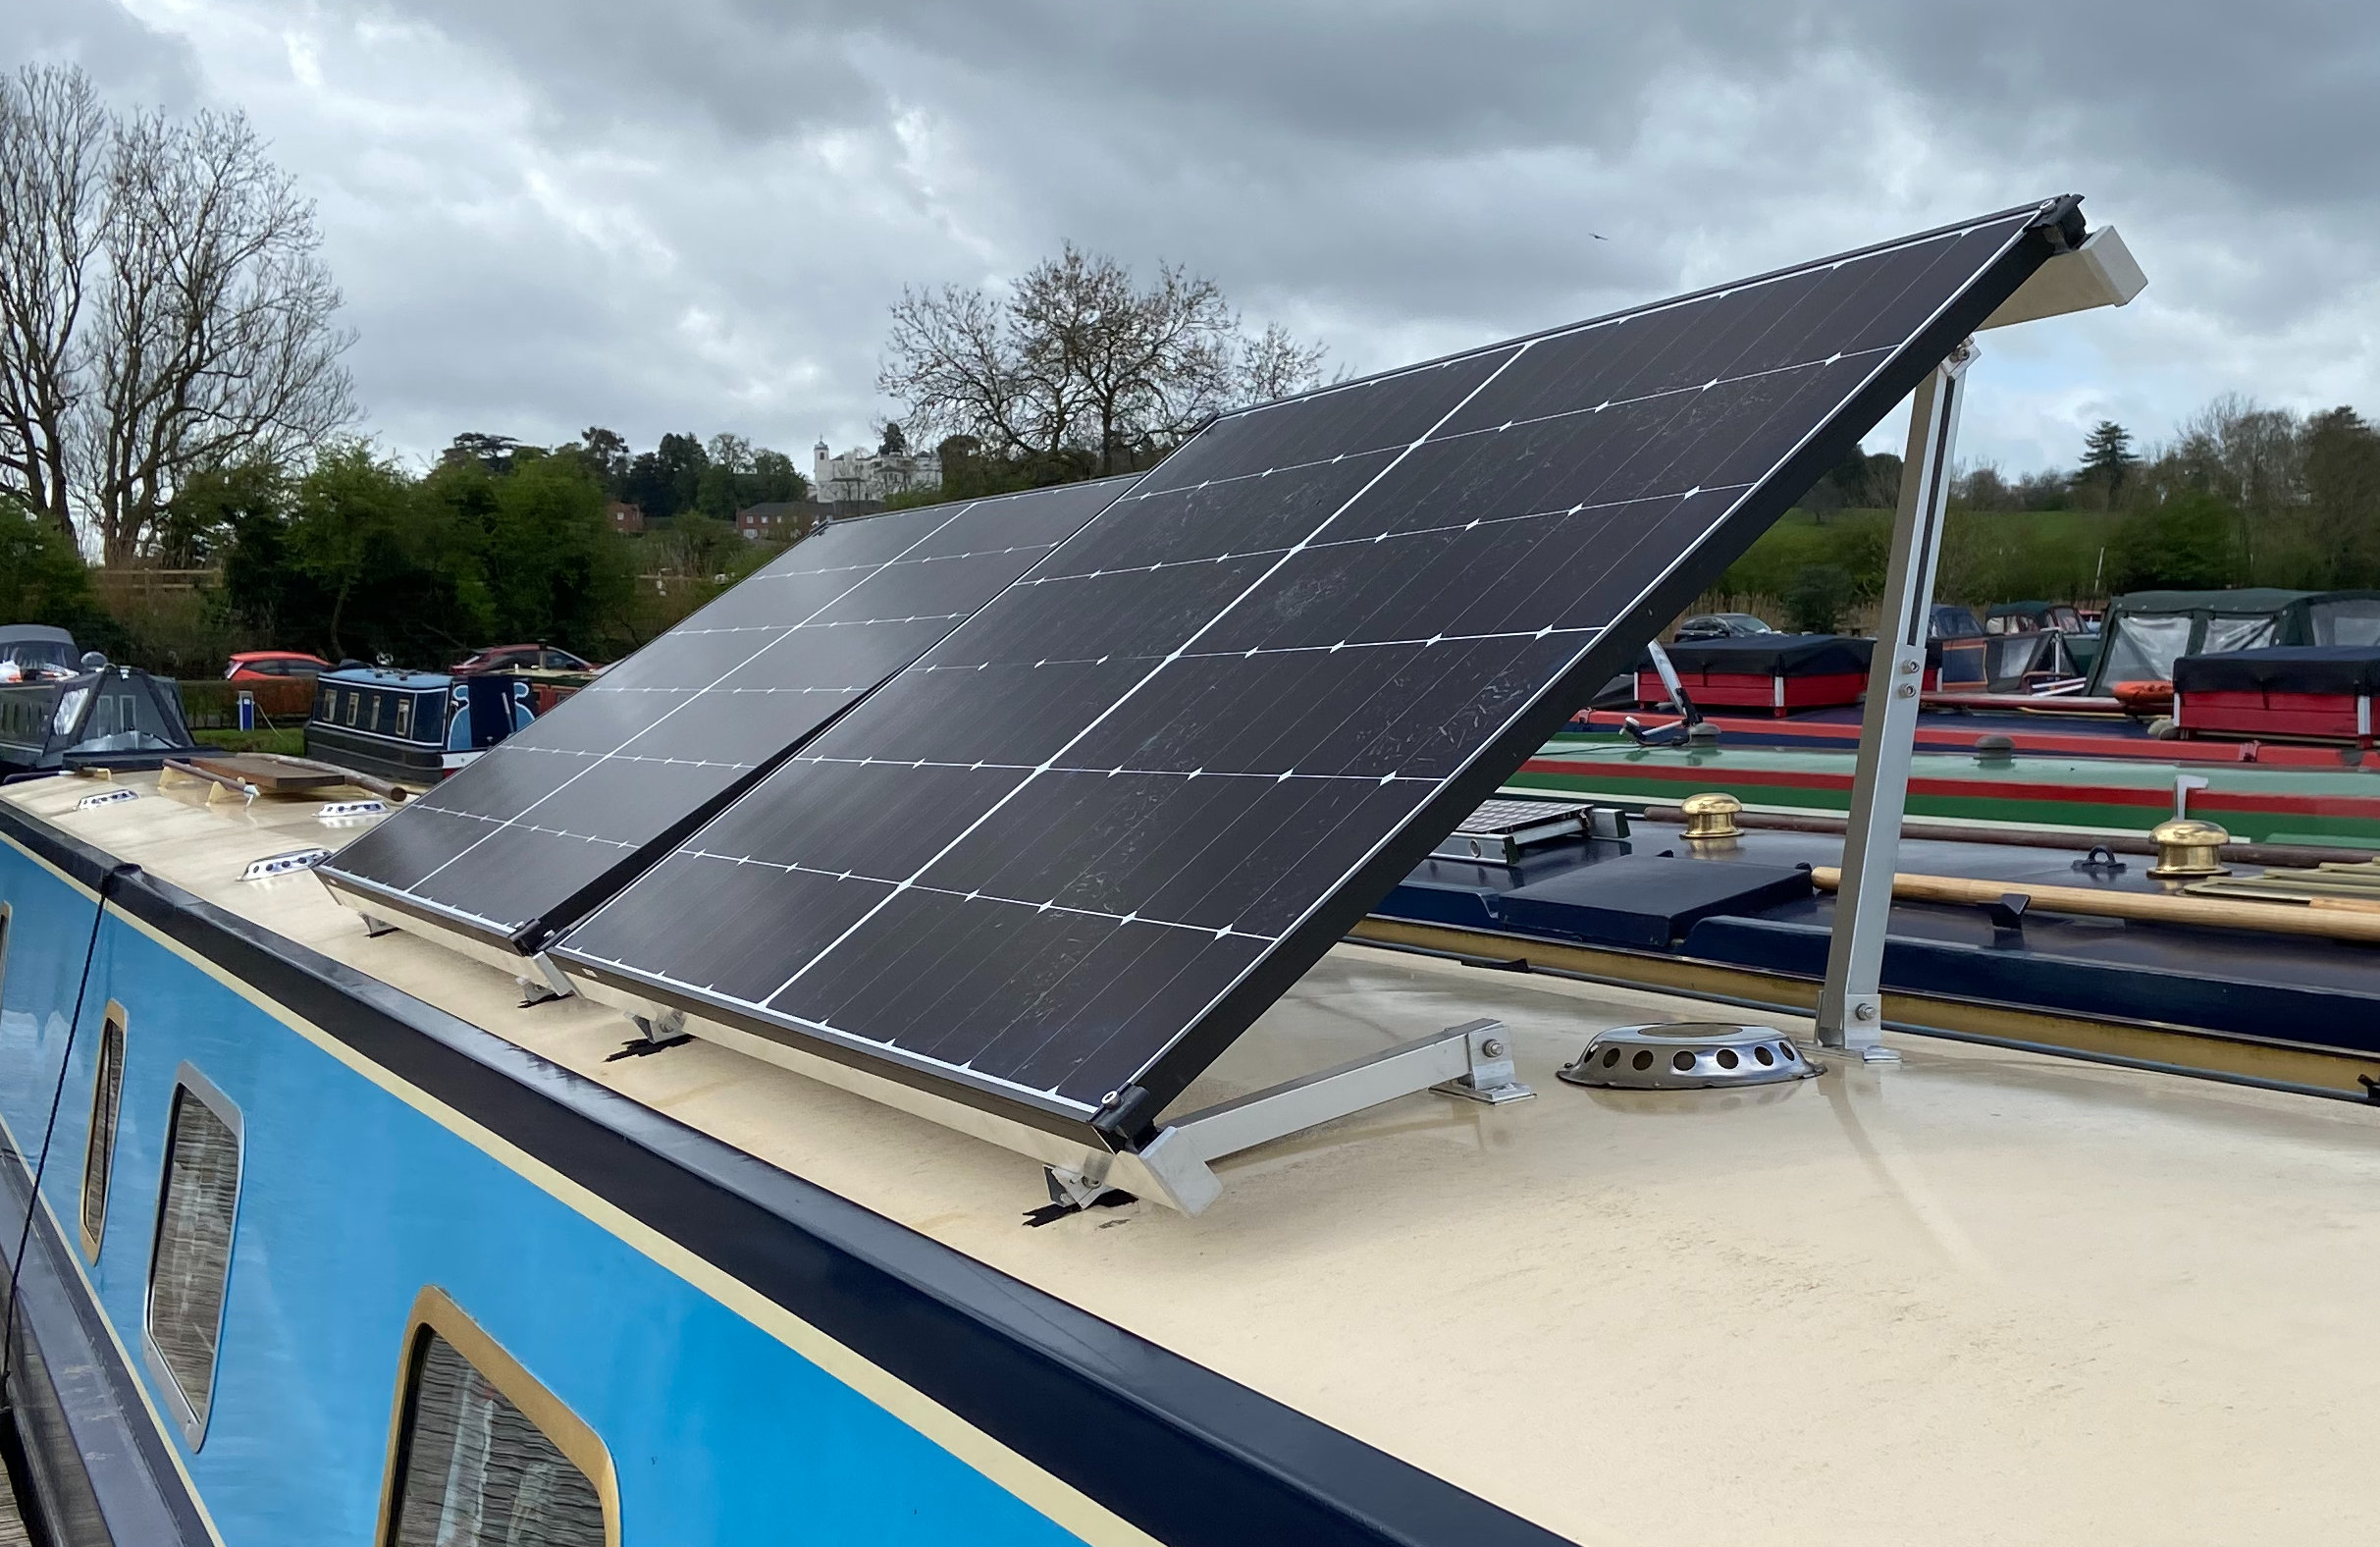
Panels Tilted for maximum power early in the morning
We did do a lot of planning and research when building this system and we will still be taking advice and measuring the performance (and reporting back our findings), but so far things are working very well and we are now disconnected from the expensive marina power.
You can see our parts list of items here, but this excludes some basic tools, like a good electric drill and a M8 tap set.
In the parts list I have included the suppliers details and in the articles listed below we explain the choices we made and why and also list any alternative suppliers and parts you may wish to consider.
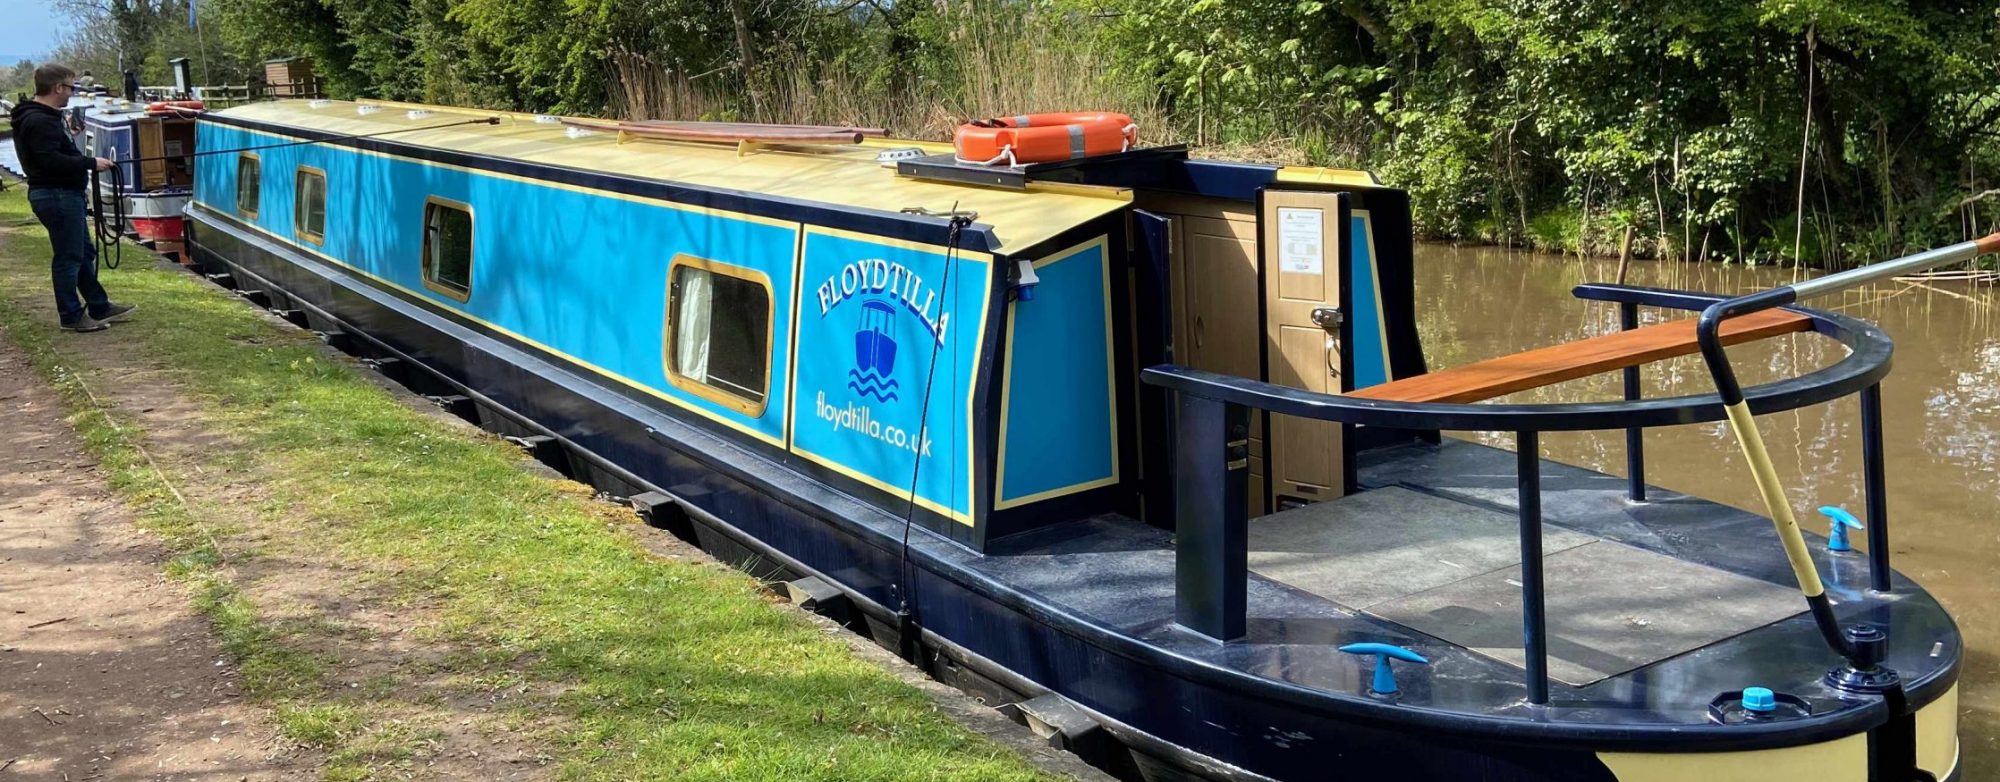
For us a low profile system was essential as we are near one of the lowest bridges on the network where the Droitwich Canal goes under the M5 motorway. Using a tilting system we hoped to be able to harvest the most power when needed while maintaining a low profile.
Low profile when folded flat
As you can see our plank and rear hatch are probably higher than the panels when lowered.
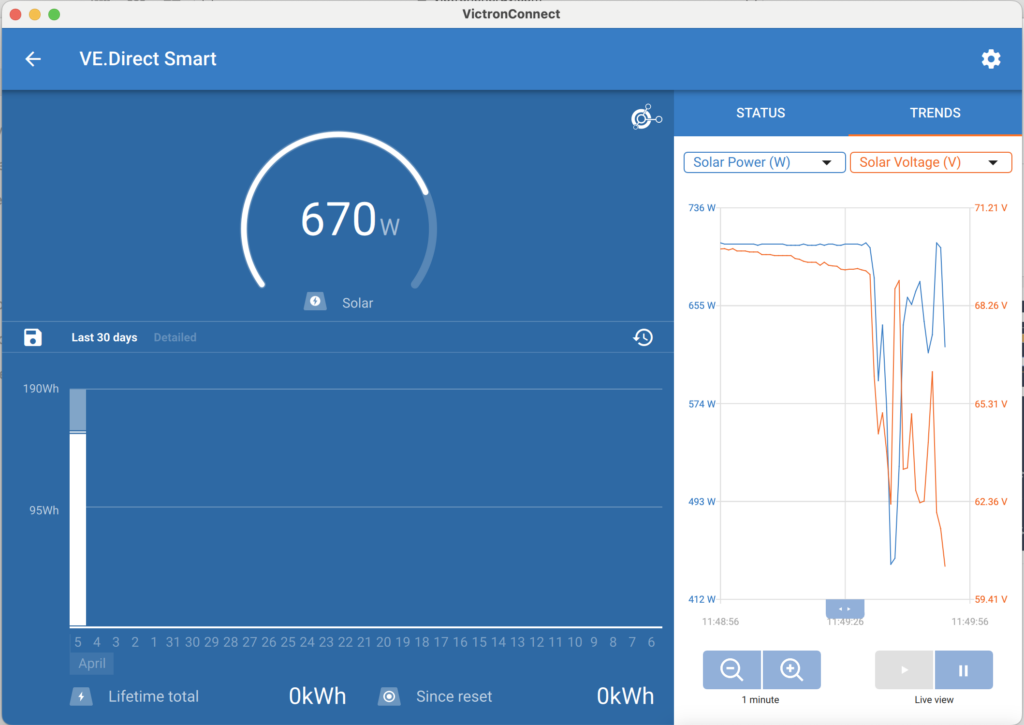
Over the next few months we will try to tilt the panels and record how much more power we can get during a normal day, but currently our first tests showed a 2-3 fold increase in power during the start and end of the day with the panels tilted towards the sun.
Coudy day with panels tilted
Below is a list of the articles we wrote during the development of our installation:-
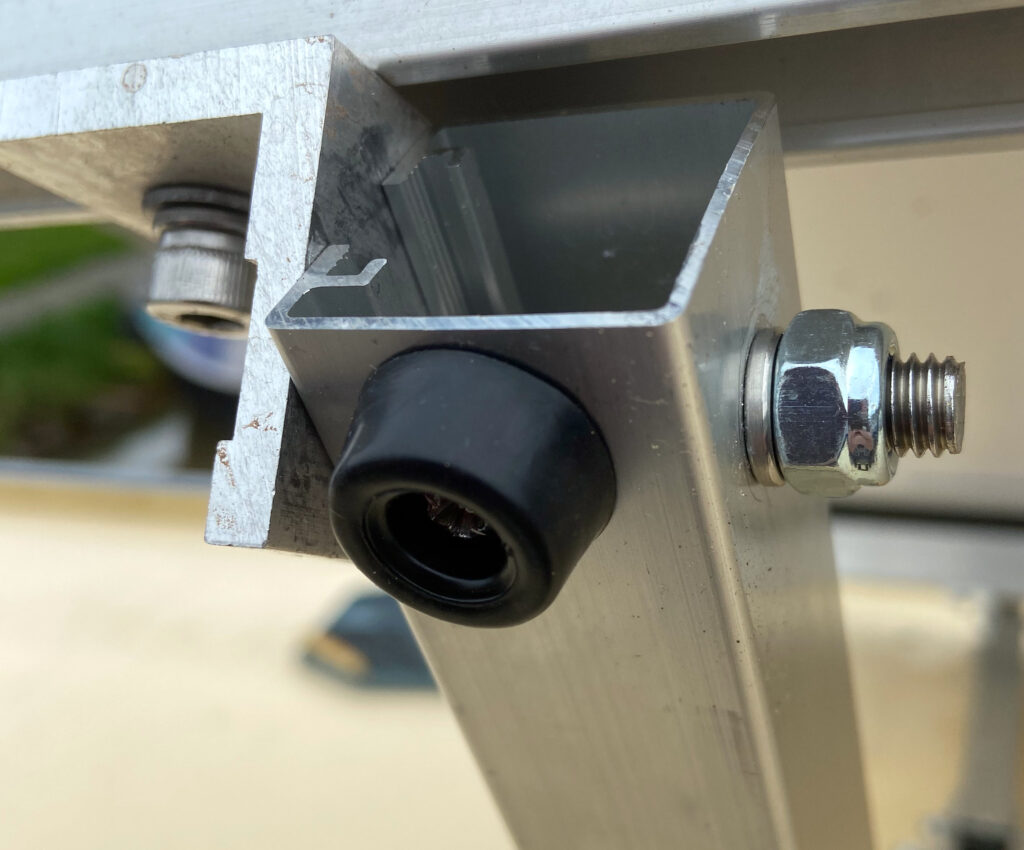
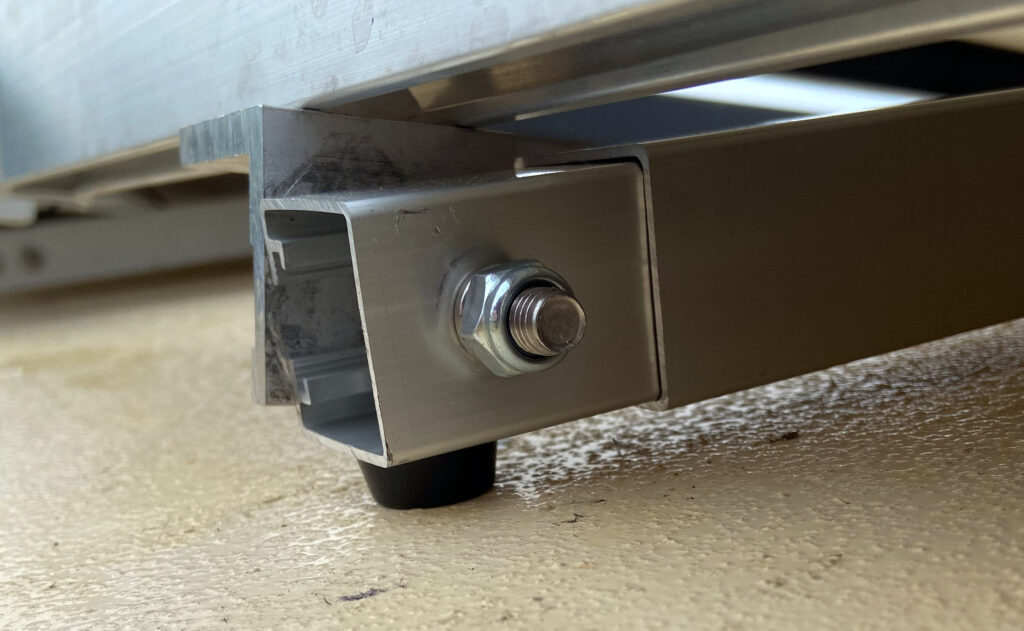
A simple fix to the roof getting scratched by the tilting system for the solar panels was to add some rubber feet, I used Adam Hall Hardware 4903 M4 Rubber feet which are 9mm tall and 20mm wide.
Feet held on with small stainless self tapping screwsSmall increase in hight, but saves the paint
I also replaced the nuts of the arms with the Nylock versions, so save them vibrating loose.
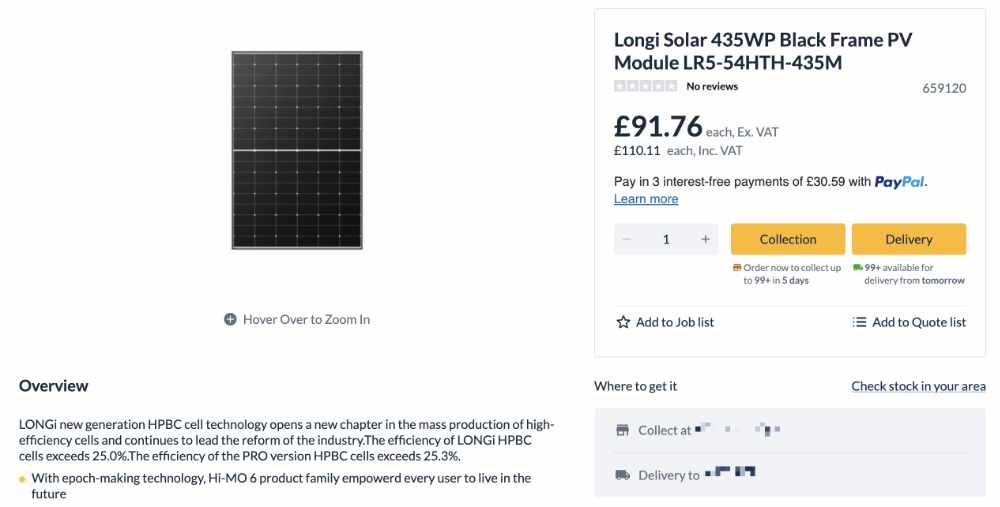
When looking at Solar Panels I wanted a know brand and also ones with a strong thick tempered glass top, many of the people I had spoken to about the panels installed on their boats mentioned how easily they flexed and therefore worried about their ultimate strength (This could be a even bigger problem with tillable mountings?).
I had discovered while trawling the data sheets for solar panels, that they seemed to come with two different thicknesses of tempered glass, the cheaper ones had 1.6mm glass while generally the more expensive had 3.2mm glass.
I also noticed the ranges available for the cheap panels changed almost weekly, I would find and interesting panel and just a few days later they would vanish from stock.
In the end I decided to go with City Plumping, who always had stock available at some very good prices. I selected 2 of their 435W panels (LR5-54HTH-435M) from Longi Solar at £91.76 (£110.11 inc VAT) each.
Best bit about ordering from City Plumping was free delivery 🙂 I had been quoted £50 for delivery and often at a price almost double for the same spec (lets hope I got a bargain).
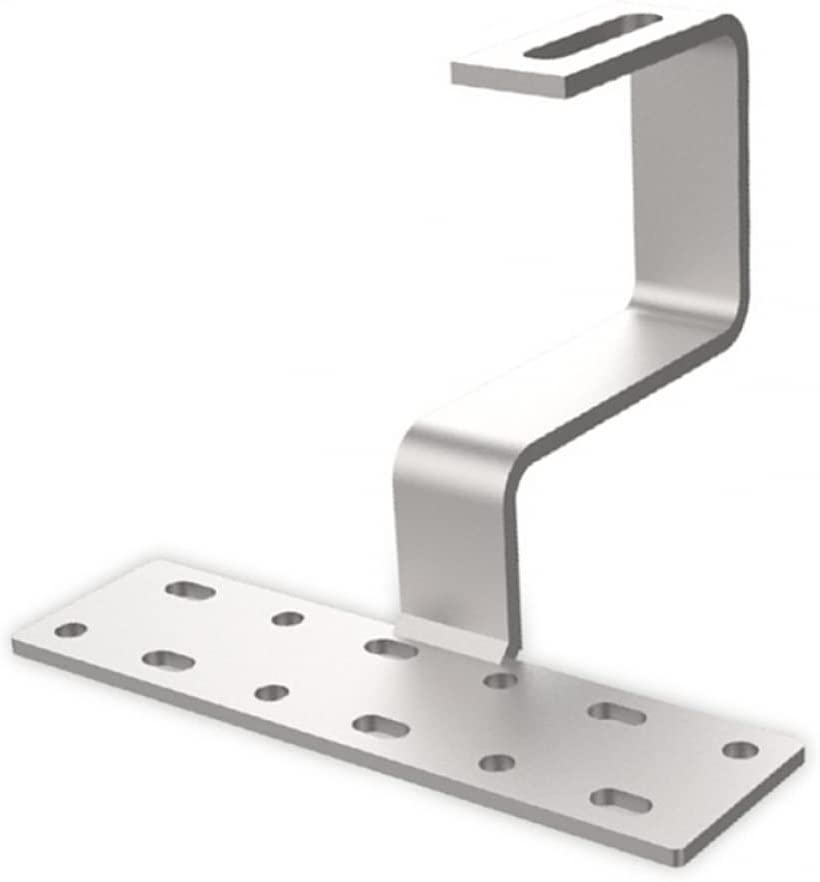
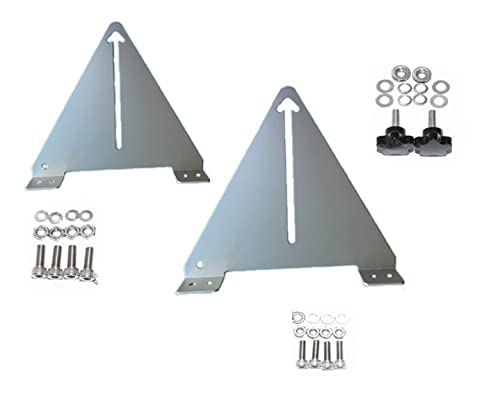
Now that I know the panels are ordered and I have the final size of the panels, I can order the mounting and after much debate and costing up alternative solutions, I have ended up ordering the Semi-Permanent Adjustable Mounting from Midsummer, they cut them to length before shipping ready for me to install.
My panels are much larger, but the mounting will be like this.
After I placed the order online with Midsummer, I followed the order up and sent over a copy of the panels data sheet, which included all the dimensions they needed. Very quickly I got a response to says they had got what they needed and it would all ship ASAP.
I did also check with the Marina (Droitwich Spa Marina) that they would be happy to hold onto the panels for me, I would not be visiting for a week. As normal they could not be more helpful, always a good experience.
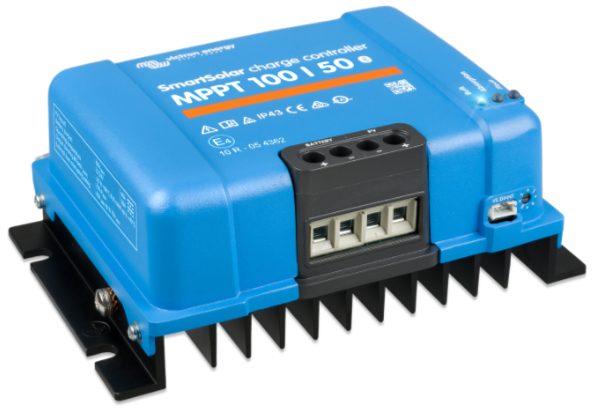
Having used the Victron MPPT sizing calculator with the correct configuration for my 2 X 415W solar panels it recommended I use their SmartSolarMPPT 100/50, if you follow the link above you should see the calculation.
Victron SmartSolar 100|50
So I was now on the hunt for the best price I could find; I tried all the normal boating solar companies, but the prices are all very similar when I found on eBay for just £220.00
*Prices Include VAT and where checked at the time of writing 07/06/2023
So the order was placed. Things got a little odd when I got a message from DPD, and it seemed they had been booked for delivery, but had not got the package, even after a few days this status did not change. I messaged the supplier via eBay with no response, but then an email from Royal Mail with shipping details arrived and a few days later it was here.
I must admit I was starting to get a little worried that it was too cheap to be true, but I have it, it is new and sealed in the box ready to be fitted in a few weeks. Now I need to find a similar bargain for the Solar Panels!
NOTE: In the package came a leaflet from Nomadic Leisure, the company that run the Nomadic Conversions eBay shop their main market seems to be Campervans and surprisingly on their online shop the SmartSolar MPPT 100/50 is £302.40
So it seems it is a good idea to shop around and try alternative sources like eBay. You may, like me, get a bargain.
Over the past few years we have looked at a lot of solar panel mounting systems, the major problems on canal boats seems to be that the roofs are curved, they are then also covered in vents, ropes and storage for poles, and planks etc.
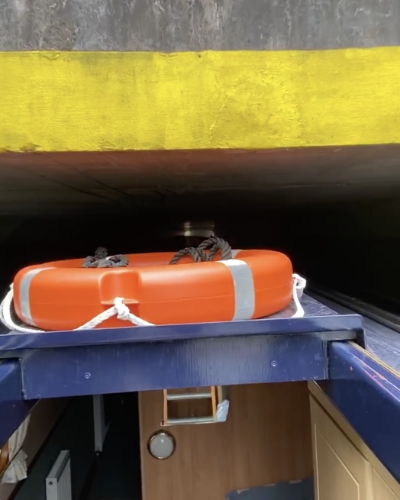
While we are moving the boat we want as lower profile as possible so we have a good clear view ahead without having to worry about low bridges etc . Our current mooring is near the fearsome M5 tunnel on the Droitwich Canal, which on a bad day, looks like it can scalp anything off the top of your boat.
All the systems we have seen are compromises dependent on the design of your boat, the design/size of your panels and layout of your roof.
Types of Solar Panel Mountings
Flat Mounting systems
Flat solar panel mounting systems are fitted directly to the roof of your boat they are probably suited to boats used in the summer months are the sun is more directly overhead.
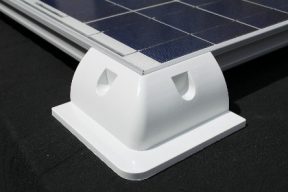
These are the simplest to install, the most basic are ABS plastic corner mounts, that are fixed to the panel and directly to the roof. If you have a curved roof you will need mounts that lift the panel at each side high enough to clear the curve of the roof. They are probably best suited to narrow panels along the centre line of the roof.
Solid ABS-plastic Solar Panel Mounts
For long panels additional side mounts are recommended to keep the panels rigidly fixed, the example about is very common, this example comes from Sunworks UK.
Raised Solar Panel Mounting
There are may other flat style mounting, some are made of aluminium extrusion, but if you have a curved roof you will need to make sure they hold you panel high enough to clear mushroom vents and that dreaded rood curve.
Flat mountsare probably adequate in the summer with the sun overhead, but we planing on staying on our boat all year around so I have been investigating being able to tilt my panels.
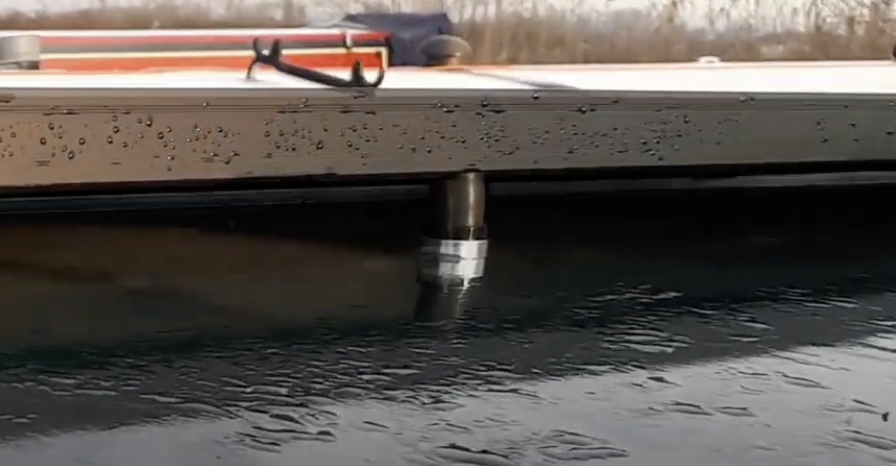
I found this solar mounting on a boat in our marina, it is home designed by the boat owner, the adjustable feet have a ball joint and are bolted into the roof with a waterproof tape in-between, then an aluminium extrusion runs the length of the panel increasing the mounting hight and also adding signification strength to the panel, that can tend to flex under their own weight.
As you can see a lock nut holds the panel up and another clamps down on the aluminium this enables the hight to be adjusted. The owner also recommended a slight tilt from to back on the panels so that rain water did not collect on the panels.
The panels are then bolted to the aluminium extrusion , there are 6 of these mounting on each panel, making them very secure.
A lot of the advertised tilted panel systems come from the camper van market where they are often placed on the ground and turned to the best position, most of the ones I have seen and not designed for roof mounting and have a fixed tilt or only tilt to one side, not ideal for mounting on a boat roof.
One of the easiest and most common boat tillable mounting systems are these aluminium triangles, that allow some angle to be set and can adjusted to each side of the roof , while use with thin panels means they can be angled well it is not ideal for wider panel as the width of the panel makes it harder to get the correct and most efficient angles in the autumn , winter and spring (see chart below).
The ever popular triangle solar panel mounts
One of my favourite YouTube channels Minimal List modified some mounting to enable them to be used on the curved roof of there boat while also allowing them to be tilted to either site, I initially like this method, but further research and I think I have found and even better solution.
Minimal List Curved roof solution.
Probably for me so far the ultimate tilting panel mount comes from Midsummer Energy
May be the ultimate solar panel mount from Midsummer Energy
As you can see these mounts are not worried by the roof curve and have can be set at a very high tilt angle, ideal for all year round use, I have even seen these tilted front to back to a limited amount.
Have a look at a YouTube video from Never Enough Cruising to see them in action
Never Enough Cruising Solar Panel Setup
Why tilt your panels
Solar Panels work best when light from the sun hits them at a 90 degree angle, else as the angle gets near to 0 degrees the suns rays are reflected and bounce off the panel and are lost. Effective tilting of the panels can increase efficiency by upto 50%.
Over the year the Sun will be higher in the summer and lower in the sky during winter, using the example of Birmingham, as our boat is moored near there, I created a table of the optimum angles to tilt your solar panels during the day for the best power output.
Note:This could be still improved if you change the angle during the day as the sun is much lower in the sky in the early morning and late afternoon.
January
60°
February
57°
March
51°
April
43°
May
33°
June
27°
July
27°
August
33°
September
43°
October
51°
November
57°
December
60°
This table is based on the assumption that the solar panels are facing south and are not affected by shading or other obstructions. The optimal tilt angle is based on the latitude of Birmingham, which is around 52 degrees north. As you can see, the angle changes throughout the year to capture the most sunlight based on the sun’s position in the sky.
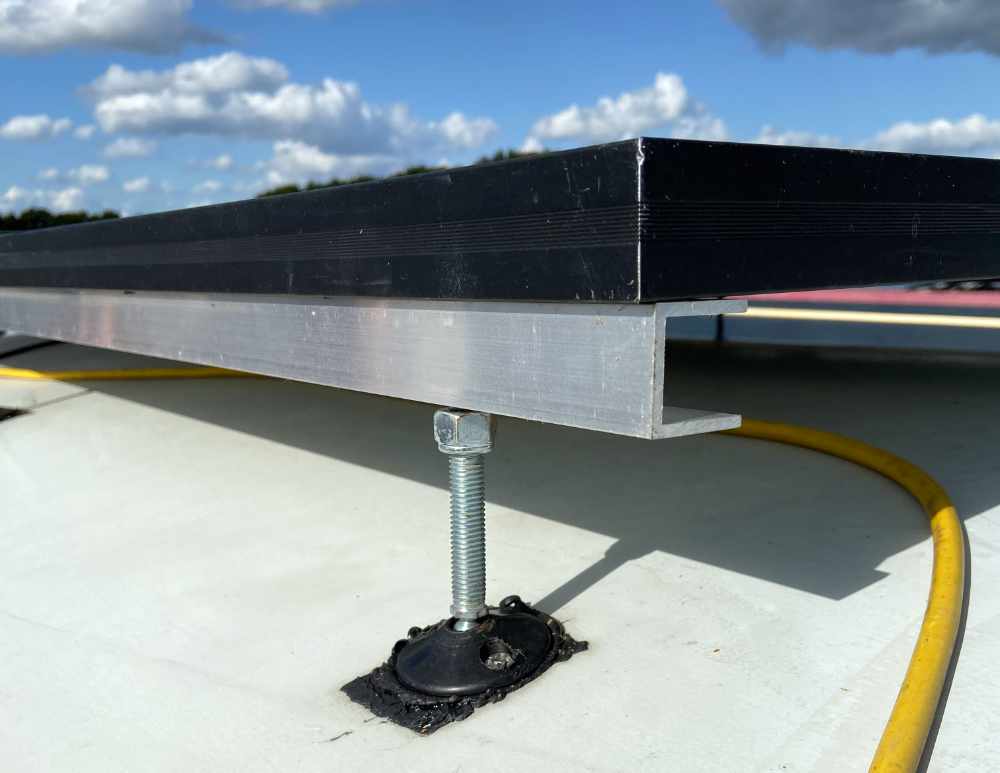
Note: Mounting your solar panels and galvanic corrosion
Galvanic corrosion is an electrochemical process where one metal corrodes in preference to another metal when it is in contact with through an electrolyte. The electrolyte is our case is dirty water. The metals are the steel roof and the aluminium solar mountings or the bolts that connect them.
You can minimise this corrosion using a painted finish, or by using non-metalic/rubber washers and or even a layer of sealant, like Sikaflex 291i Marine Adhesive & Sealant works well I am told and will be what I am using to seal/stick down my mounts
We use cookies on our website to give you the most relevant experience by remembering your preferences and repeat visits. By clicking “Accept”, you consent to the use of ALL the cookies.
This website uses cookies to improve your experience while you navigate through the website. Out of these, the cookies that are categorized as necessary are stored on your browser as they are essential for the working of basic functionalities of the website. We also use third-party cookies that help us analyze and understand how you use this website. These cookies will be stored in your browser only with your consent. You also have the option to opt-out of these cookies. But opting out of some of these cookies may affect your browsing experience.
Necessary cookies are absolutely essential for the website to function properly. These cookies ensure basic functionalities and security features of the website, anonymously.
Cookie
Duration
Description
cookielawinfo-checbox-analytics
11 months
This cookie is set by GDPR Cookie Consent plugin. The cookie is used to store the user consent for the cookies in the category "Analytics".
cookielawinfo-checbox-functional
11 months
The cookie is set by GDPR cookie consent to record the user consent for the cookies in the category "Functional".
cookielawinfo-checbox-others
11 months
This cookie is set by GDPR Cookie Consent plugin. The cookie is used to store the user consent for the cookies in the category "Other.
cookielawinfo-checkbox-necessary
11 months
This cookie is set by GDPR Cookie Consent plugin. The cookies is used to store the user consent for the cookies in the category "Necessary".
cookielawinfo-checkbox-performance
11 months
This cookie is set by GDPR Cookie Consent plugin. The cookie is used to store the user consent for the cookies in the category "Performance".
viewed_cookie_policy
11 months
The cookie is set by the GDPR Cookie Consent plugin and is used to store whether or not user has consented to the use of cookies. It does not store any personal data.
Functional cookies help to perform certain functionalities like sharing the content of the website on social media platforms, collect feedbacks, and other third-party features.
Performance cookies are used to understand and analyze the key performance indexes of the website which helps in delivering a better user experience for the visitors.
Analytical cookies are used to understand how visitors interact with the website. These cookies help provide information on metrics the number of visitors, bounce rate, traffic source, etc.
Advertisement cookies are used to provide visitors with relevant ads and marketing campaigns. These cookies track visitors across websites and collect information to provide customized ads.